Tuesday, October 21, 2014

Development & Iterations 1

Continuing from my silhouettes and initial development, as well as utilising my research into clothing in the Edo period, I began to develop a more refined character; The Queen of the story.

At the moment, it is still very rough. I only created the rough outlines of her clothes so that I know what everything is and where it should go. Creating the patterns for the clothes is a crucial step that I need to do a lot of consideration into, as I will have to keep in mind the ideal colours and detail for someone of her status. I may have to use existing designs as a reference to make sure that it looks proper for someone of high status in Edo Japan.

For now, I focused on creating various designs for her hair. Hair varied a lot from a single basis, which usually involved the hair being slicked back with wax and pinned with a comb. Some styles would incorporate a shaved in widow's peak, and are often accessorised with hair sticks and ribbons. Out of these current designs (with the first one not being an actual design, but the 'base') I prefer the rightmost, as it is not terribly extravagant but captures the essence of a very eloquent and cultured woman of power.

This is just the start, I still have to do a lot more development to create a finalised design that I am happy with.

Lighting Analysis 1

As part of our studies into lighting and how it is crucial towards creating a realistic image, we were asked to analyze a group of images of our own choosing, stating what worked well within each image using the knowledge we learnt in the lecture.


Image 1 - Temple in the Jungle by lepyoshka

It is readily apparent in this image that the light source is coming down from above, possibly through a gap in the trees. We can tell also because a lot of the water is reflecting the blue light of sky as well as green from the foliage. However, this light is also being bounced elsewhere throughout the rest of the image, although the varying angles of the thick foliage mean that a lot of this bounced light is scattered, making the rest of the environment dark and gloomy. The scattering also seems to be caused by a mist, as suggested by the far background.


Image 2 - Achtorjah Mountain by FerdinandLadera

It is not easy to see at first where the light source lies within this image. However, deducing from the saturated lights and dark shadows created on the left side of the mountains, there appears to be a gap in the clouds through which intense sunlight is shining down on the mountainside. Or, perhaps, the light source is coming from the far back, through the gap in the mountains on the right side of the image. One can see distantly that a similar situation is happening where the front side of the mountain is being hit by the light, leaving the rest in shadow. However, due to the diffused light of the mist, this is not as easy to determine compared to the foreground. There are examples of some bounced light, most notably within the valley in the centre of the image, as the side of the rock is still visible even though - after determining the light source - it should be in shadow.

Concepting a medieval street by Gycinn

Image 3 - Concepting a medieval street by Gycinn

There is plenty of bounced light within this image. Even though there is a light source shining in from the right and the top of the image, a lot of the image is not directly influenced by the light, instead gaining shape from bounced light off of the various buildings. However, the bounced light can only reach so far, as various areas are left in deeper shadow, such as the shop door and the wall as it gets closer to the foreground. There are a few examples of the atmosphere itself reflecting directly off of some parts of the image, which is demonstrated by the blue tinges on the wood structure of the building on the right side of the foreground.


Image 4 - Winter Village by andreasrocha

There is no direct source of light in this image. All of the light is diffused, having to pass through the thick layer of clouds before it can reflect off of the houses below. This creates very soft, desaturated light which is very dim to the viewer. However, because of the way the clouds are lit up I would determine that this image is set in the early morning, just after sunrise. This is due to the intense shadows that are still there in places. These shadows are predominately facing toward the viewer, which is shown by the tower in the foreground on the right, where one side of the roof is less in value compared to the side which is facing towards the background and thus towards the sun's diffused light.

Resistance 3 - Mines Pt 2 by dee-virus

Image 5 - Resistance 3 Mines Pt 2 by dee-virus

In this image there are some prominent light sources, scattered throughout all of the image as lamps. It can also be determined that there is another lamp down below the floorboards of this level, as shown by the intense lights that leak through the floor and the hole. It is possible that the light source on the far right is from the sky and not the flame of the lights because it is much colder in colour, in contrast to the warm light that comes from the lamps. These lights create a myriad of shadows due to the beams in the mine blocking their light, being much darker and more intense due to the relative closeness and intensity of the light sources. There may also be some instances of bounced light towards the left side of the image as there are fewer light sources over there, yet it is still visible to the eye.

Fjord by SebastianWagner

Image 6 - Fjord by SebastianWagner

The light source in this image is the sun, coming down from above but slightly to the left of the centre of the image. This is determined due to how the rocks are lit - the left side is in the light whilst the right side is casting a shadow across the water. Although this light source is not very intense because of the lack of intensity to the shadows. Due to the low angle that this image is viewed at, the Frenel effect is visible from the rocks being reflected off the water's surface. However, this reflected light is very diffuse and it is impossible to see the rocks in the water aside from their rough shape.

Saturday, October 18, 2014

Silhouette Summary & Development Part 2

After producing a first set of silhouettes, I still felt I could produce more, so I experimented with different brushes. One of the best ones I found created a very erratic and spiky effect when moving the pen quickly, whilst being small when I was slow and consistent with my brushstrokes. This created a good variety of parts that stuck out, which I could turn into various accessories later on.

I saw a lot more potential in the silhouettes developed here. I kept in mind the basic shape of the kimono which is very prevalent throughout Japanese clothing. I also began to form a basis of what character I wanted to create. Whilst originally I wanted to either do the soldier or the witch from The Tinderbox, after doing my first silhouettes I felt more drawn to the Princess or the Queen, as this would allow me to bring in quite extravagant designs as the royalty often wore quite bright and detailed clothing to denote their status. Here are three silhouettes that I developed so far from this silhouette sheet. 
The first design I feel could represent the soldier, however I was not terribly drawn to this idea compared to the next two. The second could represent the King or Queen, since I did not give the design a defining gender and I could transform it into either. Judging from the pose, I feel that the second design would be more male, though. The third design is possibly my favourite out of the three, although I know it needs more development after my research into fashion designs in the Edo Period. I may just select this one to develop from here on as I feel like the pose is very expressive for the Queen, who I felt to be quite aloof and very confident in herself.


Silhouette Summary & Development Part 1

Since being given the theme of Edo Japan for my first project, we were set to produce silhouettes towards our first character design. The basis is from the short story The Tinderbox, within which we are supposed to apply our themes. From the first character design tutorial I was given the impression that silhouettes we create should be quite formless, using only subtle suggestions to show the form and pose of the person and to have little to no design to it so as to not form pre-conceptions.

So, I began, using a large brush set at a fairly low opacity. It was mostly like scribbling, but trying to stick to very loose guidelines such as maintaining a fairly human-looking shape. These silhouettes were the result of the first go-around.


At first, I used a very low opacity, but I experimented in increasing opacity and using a smaller brush size for creating silhouettes. The only problem with creating very fast and formless silhouettes is that there were a lot that I did not see much in, so a lot of these figures were not developed at all and only a few were selected. The following were selected and developed further, as shown below.


I developed more of a form with these figures, but I did not add any defining features or personality as I could very much change my mind upon seeing other figures. I only chose one to detail further, yet I still kept detail to a minimum until I researched into clothing designs. I still do not think that I am not finished with this stage as I feel there is still more that I could explore and experiment with in terms of silhouettes and early design.


Kimono Design in Edo Period

As stated previously, kimono design evolved due to craftsmen adapting to the strict rules that the shogunate had put in place to keep social classes in their place. Subdued designs often became the norm as some colours such as red were forbidden for lower classes, as well as certain fabrics. Higher classes, including royalty would still proudly wear forbidden colours such as red, but craftsmen creatively applied them, such as along linings and underneath, which were not restricted by the laws. Here are some images that would represent kimono designs of the time.


Images of Women in Edo Period

Here are some gathered images which can be used as reference towards women in the Edo Period. For explanation, refer to the last post, http://lauraatnua.blogspot.co.uk/2014/10/female-clothing-in-edo-period-japan.html


Female Clothing in Edo Period Japan


When one thinks of clothing in Japan, what they generally think of is the Kimono. Kimono generally are the wrap-around clothes that a lot of people see when looking at traditional Japanese art. However, there is a lot of structure and social rules behind the kimono. One of the first rules is that the left side of the kimono must always go over the right (when looking down at yourself). Kimono are also square cut and have rectangular sleeves. The sleeves vary depending on multiple things, such as the age, sex, class or occupation of the person as well as the current occasion or season. There are also multiple layers that are usually worn. An under kimono, usually made of plain and easy to clean fabric, goes on first over which the kimono goes. Oftentimes in warm weather, a small collar covers the spot usually covered by the under-kimono. This also allows elaborate patterns to be displayed there. Clothes are never hooked or tied, instead being tied with himo, which are straps sewn with folded fabric. Over the himo goes the obi and the obi sash. The obi also varies extremely based on age and status. The obi’s bow always goes at the back of the person. (1)

Kimono in the Edo period were generally used as a representation of social status in the higher classes and whilst lower classes were able to wear them, there were restrictions in place. After wealthy craftsmen and merchants began to show their wealth by buying and wearing gaudy and expensive clothing, certain fabrics, techniques and colours were forbidden for use by the lower classes due to the fear that it would upset the rigid social structure that was in place at the time. This encouraged the craftsmen to create new techniques and eventually change what was in-style, switching from bright colours to more subdued tones, as well as often toeing the line by using colours such as red (which was forbidden) in places such as linings, which were not restricted. (2)

For women, a cylindrical shape is essential, and there will often be pads worn under the clothes to maintain this shape. The kimono’s back is often low-slung, showing a lot of the back. Showing the front is frowned upon. Many hime, or high-born women would wear a red or purple brocade, with an outer kimono that trails along the ground which is highly embroidered in gold, going over the obi.
For footwear, sandals are almost always worn unless in rainy weather. For when it is cold, tabi, or split-toe sock are worn, which are designed to be worn with the sandals. Sandals are always taken off when entering a place, so the tabi also serve a function as slippers. When it rains, geta are worn, which are like clogs. They have platforms on the bottom to keep the wearer away from mud and puddles, but are otherwise similar to their sandals with split-toe straps. (3)

Hairstyles for women also varied greatly. In the Edo period alone the hairstyles of women grew very extravagant, adorned with many combs, hair-sticks and ribbons, being waxed and tied into elaborate patterns. In the early Edo period, shimada mage, the hair is looped back and slicked with wax, with a comb inserted in the back. This style evolved and grew, with some having the comb positioned front-facing, including several hair-sticks. There is also another style called the yoko-hyogo, which emerged in the late Edo period. In this style, a large volume of hair is placed on top, with the sides waxed to spread out, representing wings. This style is adorned with many combs, sticks and ribbons. The hair is also shaved at the temples and forehead to create a widow’s peak. (4)

Bibliography:


Friday, October 17, 2014

Story Synopsis

Since being given the basis of the story 
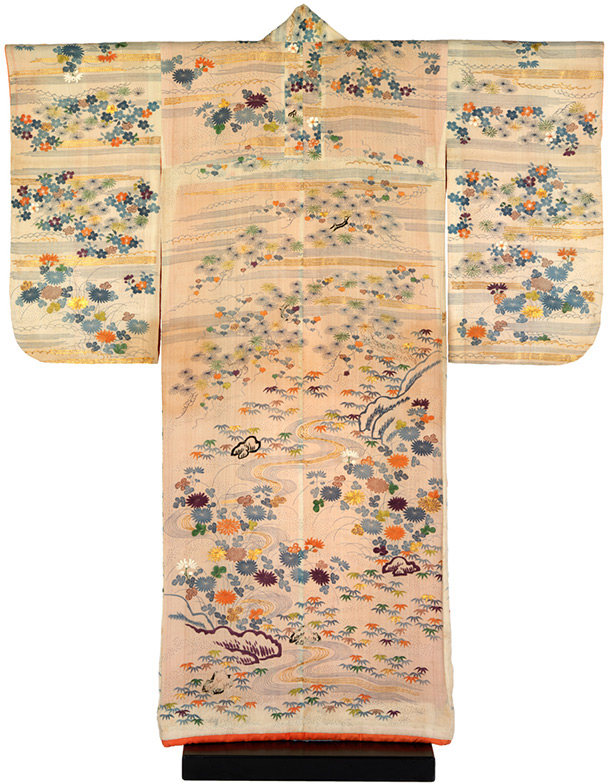
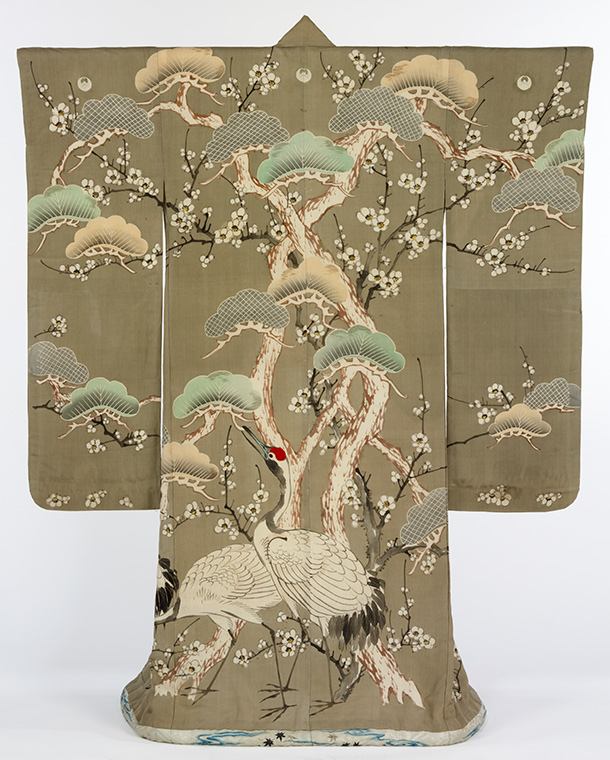
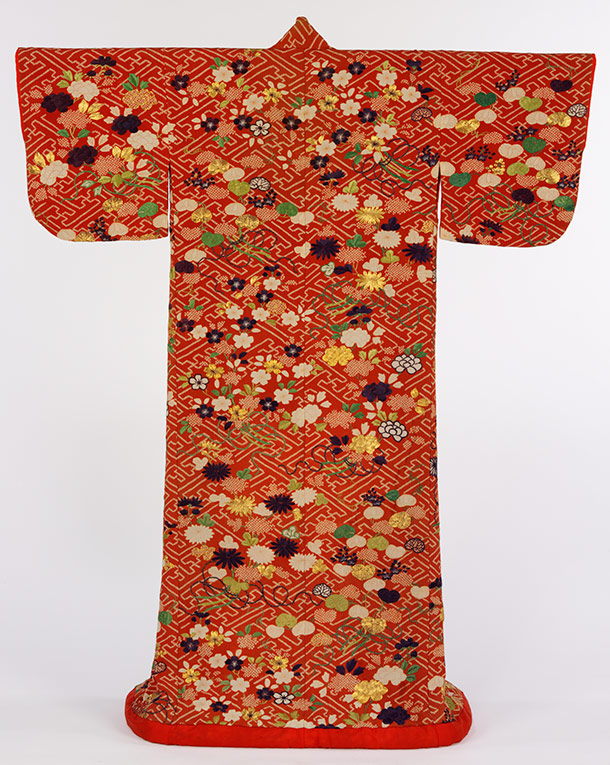
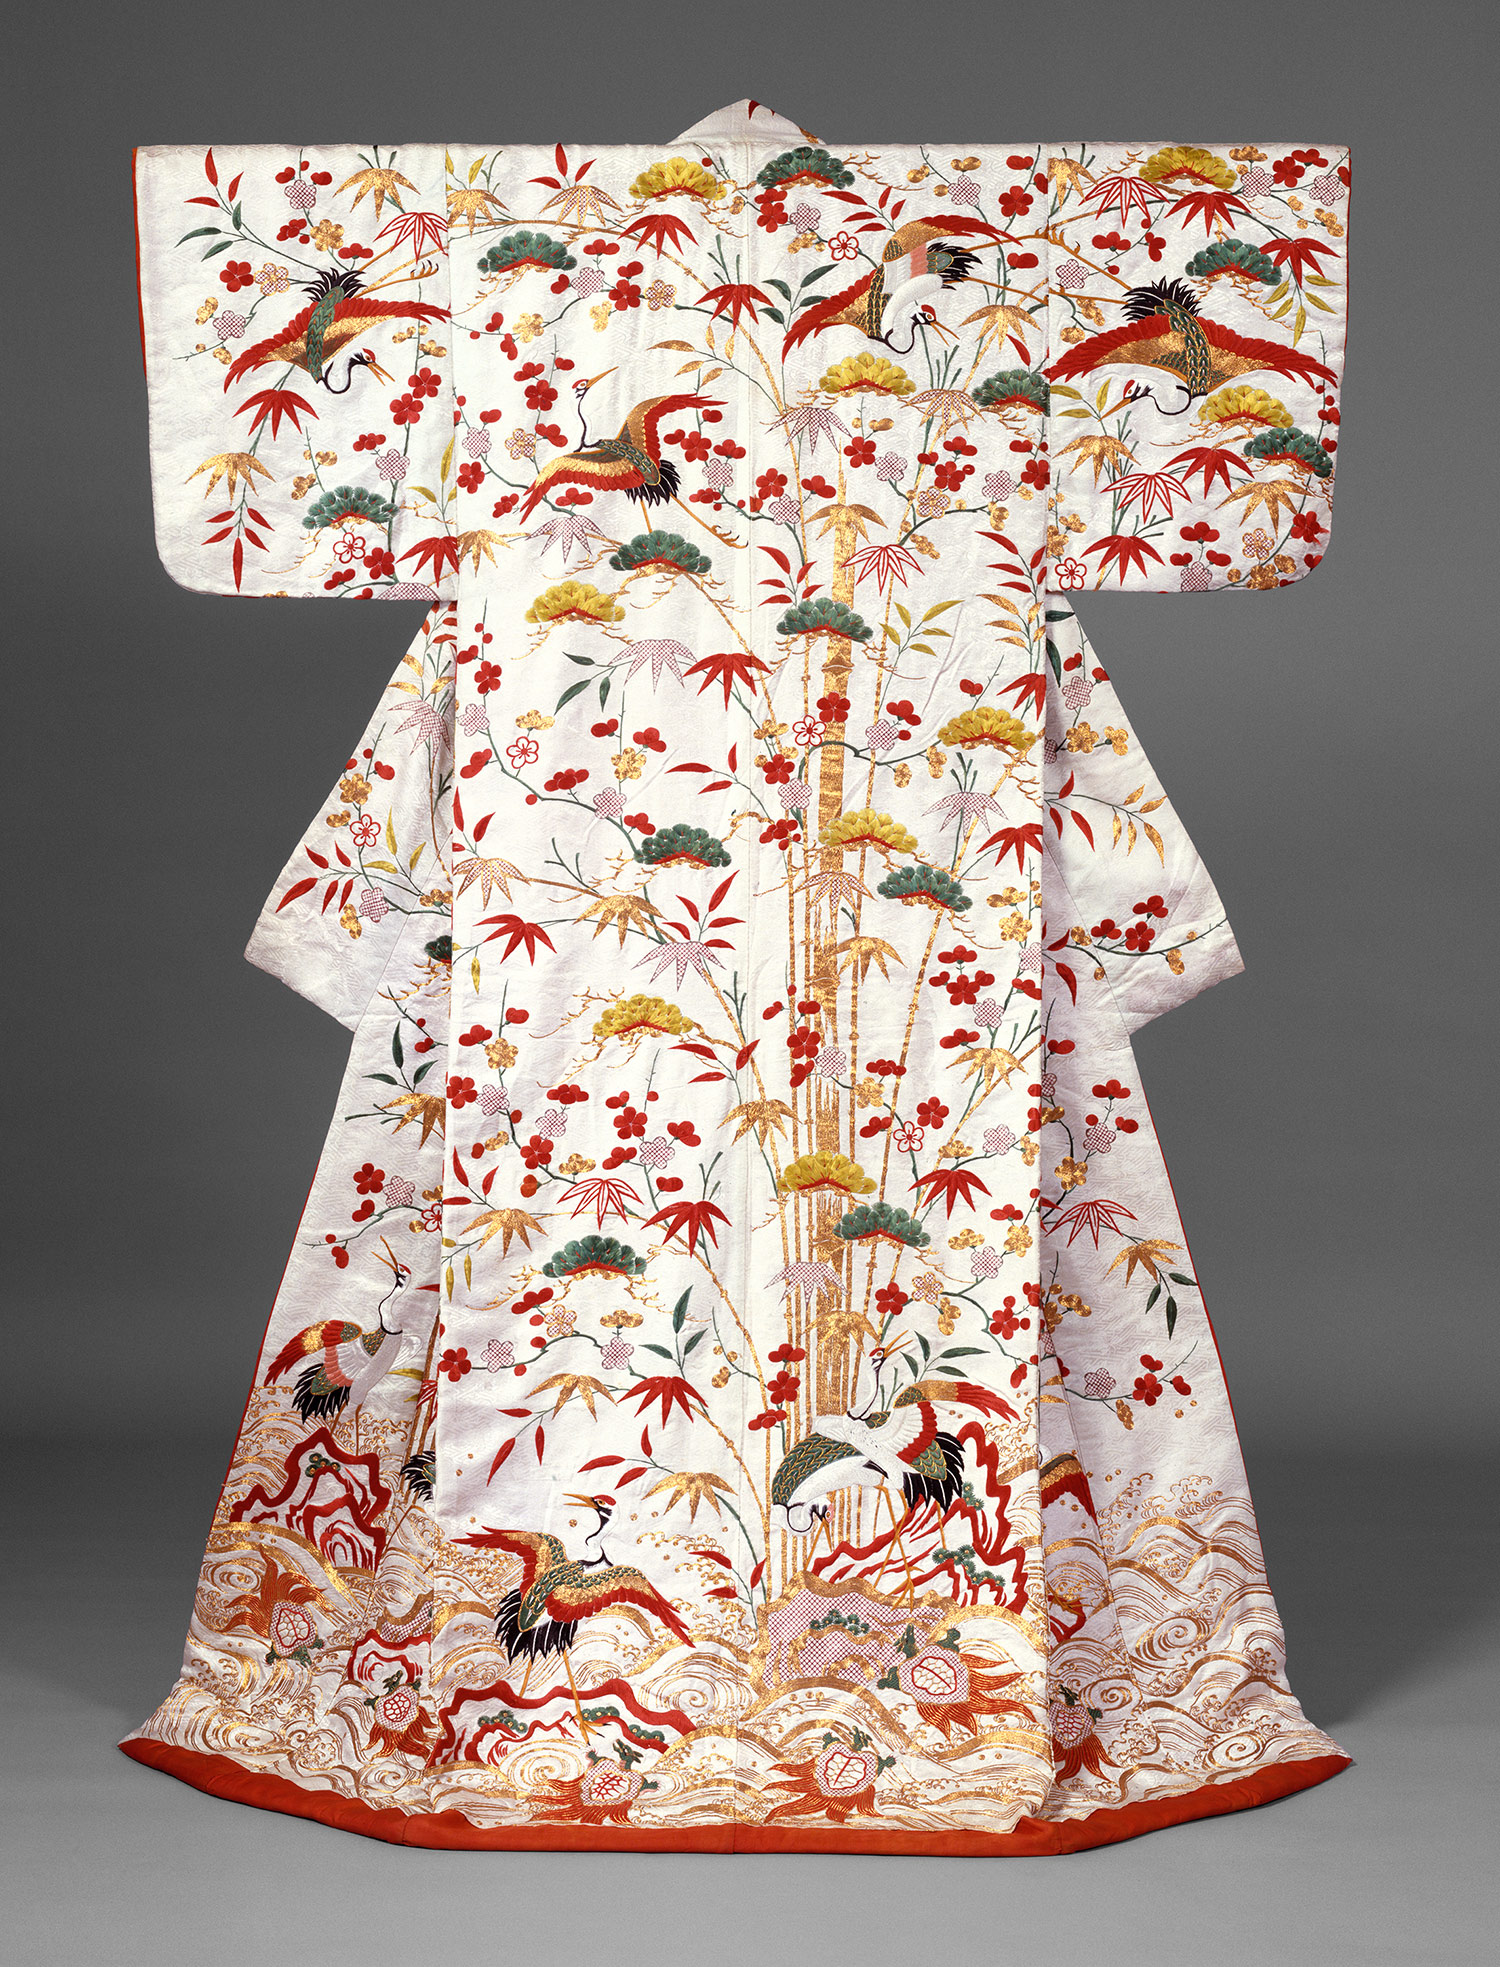
The Tinderbox, we were also asked to provide a brief synopsis to show our understanding of the story before we begin development of our characters and environments. I think it would also be a good idea to transpose this story into the setting I have been provided, which is Edo Japan.

Synopsis:

A soldier is returning home when he encounters an old witch. This old witch asks him to go into the depths of a tree and fetch her tinderbox, whilst warning him of the dogs that he must take care of in order to take their gold. He was told that he could keep the gold so long as he gave the tinderbox back to her.

So he went into the tree, dealing with the dogs and taking as much copper, silver and gold as he could. When he found the tinderbox, he left the tree and was about to give the tinderbox to the witch before he was overcome by his curiosity as to what she wanted with it. When she refused to tell him, he cut off her head and kept the tinderbox for himself.

He lived for a while in relative comfort due to his acquired riches. At this point he learns of the princess, who is kept in secret because she was said to be marrying a common soldier, which the king would have nothing of. He pondered upon this, whilst he ran out of money and returned to what he once was - a poor soldier. He finally decided to find out what the tinderbox did, and struck it.

The three dogs he encountered earlier came to him, from which they asked what he bid of them. He first asked for more gold, before asking the dogs to bring him the princess. At the end of the night, she left speaking of strange dreams. This aroused suspicion from the Queen, who decided to use various methods to find out who was stealing her precious princess.

First they tried to mark his door with a chalk cross, but he outwitted them by crossing all the doors in town. Then they filled a bag with flour and tied it to the princess, which successfully led the King and Queen to the soldier. He was taken to be hanged in the morning.

However, the soldier asked someone to fetch his tinderbox, and on the morning when he was to be hanged, he used it, telling the dogs to 'let him not be hanged'. The dogs let rip a massacre, killing both the King and Queen and all the judges. The soldiers and people were so afraid they decided to make the soldier the new King. In the end, the princess did marry the common soldier, even if the King tried to prevent it.

Transposing the Story:

In Edo Japan, maintaining class structure was vital, so the idea of a mere soldier marrying into a ruling family was unheard of. Instead of the King being a King, I think he should be a Daimyo, who is a figure that ruled under the Shogun. Most Daimyo only ruled over a small area of land, but some had truly great ranges to their rule.

I would like to think that, in this story, the soldier would be a Rōnin, which is the term for a samurai with no master. In tradition, a Samurai is supposed to commit seppuku if their master is to die, so that they can join them in death. However, in the Edo Period, there was a large increase in Rōnin due to the immense amount of restrictions and confiscations of fiefs. Some Rōnin would hire themselves out as mercenaries, whilst others would turn to a life of crime. I believed a role as Rōnin on the criminal side would have suited the soldier as he seems to not have much of a moral compass, serving no master but his own.

The dogs, I decided, would not be actual dogs as the animal, but three individuals of the lowest class. In the Edo Period, there was a group of people outside the four main classes, whose professions broke taboos of Buddhism. These groups were known as the Eta, which served as butchers, tanners and undertakers, and the Hinin, which included town guards, street cleaners and executioners. Not all of the outsiders were included in this category, however, with occupations such as beggars and prostitutes also falling into this lowest class. Hinin were only allowed into special parts of the city, whilst Eta lived in a totally separate place altogether. The 'dogs' would be beggars, so not part of either Eta or Hinin, but complete outsiders. The money they earned from begging would be split into the coins that each 'dog' kept an eye on, but they would also steal money from each passerby who would stop to pity them, in spite for being in a higher class than them.

The only characters I have trouble pinning down are the Witch, Princess and Queen. There are a lot of sub-classes within each social class, so I would have to consider and do more research into these social structures to pin down a role for each.

Thursday, October 16, 2014

Learning Corel Painter

Today, we were introduced to the painting program, Corel Painter. Having used Photoshop’s various iterations for many tasks over the years, using Corel Painter instead feels like coming back to something having been away for a long time – you remember some important things, but a lot of it has changed. Some features worked similarly in Photoshop, whereas some seemed archaic in nature. For example, it puzzled me that the ‘Clear’ command wasn’t, by default, set to the ‘delete’ key, forcing me to go into the menu to clear my canvas. There also were no apparent ways to merge layers, though I suppose that this should not be an issue if I get into the most efficient method of working as layer merging is not easily reversible. Even so, it wasn’t terribly difficult to get into some working flow by the end of the session, but there were still some hiccups that would be expected upon the first use of a program.
It wasn’t just adapting to the new software that I posed a little problem in. Having worked on solely PCs, I had never used a Mac before, or at least the keyboard of a Mac when used within Windows. Being used to having the alt key on the left side of the spacebar meant that, more often than not I was opening up the start menu rather than doing the commands I wanted, using the eyedropper being one of them.

Even with the hitches today, this is just the beginning of a new learning experience. Even though I understand a little about Corel Painter, I am aware that I will be introduced to software that I will have had no prior similar experiences in. Even though in the past I have tried to learn some of these programs (Such as Maya), I am wondering how easy it will be to understand when there is an actual person showing me, in contrast to reading tutorials and figuring it out myself. Either way, only time will tell.

Wednesday, October 15, 2014

The Beginning

As part of my first project studying Games Art and Design at NUA (Norwich University of the Arts), I've been asked to create a blog which documents my progression throughout the project. Here, I'll post things like my thoughts, developments as well as discoveries and knowledge that I have learnt independently for this project or in the lectures that I am given. This may be both text and image based, as I will be developing both visual style as well as contextual research towards Game Design and other topics.

There is no better way to go but forward, so either way, here we begin.