Tuesday, February 10, 2015

Self Evaluation for BA2

From the start, I was excited for this project as I had a limited experience of ZBrush so far and was hoping to learn more about the program and streamline my 3D workflow. The theme of Gargoyles I was a little dubious about at first since I wasn't sure what I wanted my gargoyle to be based off of, but I quickly got into an idea which meant I did not feel de-motivated at any stage of the project.

For strong points, I felt like my iteration process was a lot better done this time around. I used a mixture of both 2D and 3D iteration to best visualise how my gargoyle would come out, so I got a really good feel for the silhouette and how it would look later on. This, backed up with my visual research in the form of many mood-boards as well as contextual research, meant I had a strong idea and the evidence to back it up. I also was very strong at working quickly in ZBrush. I was able to quickly learn the processes taught to me in the workshops and apply them to my own work, as well as being able to demonstrate these methods to others if they were unsure of how it worked. I also sought out some methods on my own before they were introduced in workshops, such as learning how to use Alphas, as well as subtraction via Subtools.

However, there were some weak points in my project. My biggest concern is that I did not seek enough advice from my peers, such as asking what iterations they thought looked the best. I think that if I did this I may have had an even stronger final result. Even though I presented my work every Group Crit, I did not get very many crits that I could have used, so I should probably prepare some questions to ask for next time. I also felt like my 3D iterations could have been improved on a little. I did few actual iterations within 3D as most of my images were just progress work.

For next time, I could improve on the previous points, and make sure to make my work-in-progress public so that my peers can rate how I’m doing and offer crits without having to wait for the weekly crit session to do so. I would include questions and queries with my posts so that I could get more focused responses and make sure my peers’ advice is relevant to my work. I could also work more on 3D iterations, by using the Transpose tool as well as layers and subtools to quickly get iterations down which I can show by using the screenshot button.

Overall, however, I vastly enjoyed this project. Being able to see my work evolve over time and producing what I believe is a quality asset makes me pleased, and I am glad that I put the effort in to improve over last project, as is shown through the quality and amount of work that I produced. I am looking forward to working with ZBrush again in the future.


Friday, February 6, 2015

Final Sculpture for BA2


This is my result for the project in which we produce a game-ready asset. My gargoyle is based off of the design of the fantastical creature, Cockatrice. Since gargoyles in and around the medieval era were mostly designed to look like evil creatures to lure people into the safe haven of the Church, I thought that the Cockatrice would be a perfect subject because of how it is known to kill with just a look.


The above picture shows the topology of my model at a lower subdivision level. This is at subdivision level 2, or one subdivision above the lowest. I utilised the use of both a UV map (generated with UV Master) and a displacement map to get the detail of the high-poly sculpt onto a lower poly model. At this subdivision, the model is around 40,000 active points.


This picture shows how the gargoyle would be utilised to funnel water from the wall. The gargoyle would most likely be mounted on a pedestal, with a trough leading water to the top of the tail, which the trough carries along the top of. The water is led across the tail into the back of the head, where there is a hole that runs through the head into the mouth. The water runs through the head and out the bottom, where it is flung far away from the wall the gargoyle is resting on.


While the back of the model may not necessarily be seen due to how it is mounted on the wall, it is not devoid of detail. This is in case it is placed somewhere where these features are visible, such as if it were knocked off the wall and is lying on the ground.


These images show the gargoyle in poses it would probably be seen at in reality. It is still clear what the overall silhouette of the gargoyle is, meaning that I have created a good, strong form within my gargoyle. Overall, I am extremely pleased with how this came out and am impressed at the quality of work I was able to produce with a product I am relatively new to.

Friday, January 30, 2015

3D Iterations Part 7

Since I planned my gargoyle to be old and worn, I thought it would be a good idea to try and put some lichen textures on it.


My first attempt did not look very great since I didn't consider how the lichen would form. Plus, I feel I did not achieve the right effect for lichen, since it is usually quite pronounced against the stone, unlike here where it blends in too much. I also needed to tweak the material, colour and lighting as here it does not look like any kind of stone at all.


Here is the second attempt with the textures, whilst also changing up the lighting and reducing the specular on the material. I did a much better job this time around, but I had to create new alphas both for the lichen and the cracks as I could not achieve the desired effect with what ZBrush had by default. I am please with how this came out, so I may keep this as my final sculpt.


This is the alpha I used for the lichen. I wanted quite a rough texture so I did not blur as much as I did with other alphas. Plus, I kept the inside of the lichen less bright so as to utilise the gradient option when polypainting (darker areas will use more secondary colour, lighter areas more primary colour). This produced a nice variation in colour and tone, which I believe created a fairly realistic lichen texture on my sculpt.


I also created my own alpha for the cracks, which I dragged out with DragRect and my brush set to ZSub. I didn't want too many cracks so I kept the image rather sparse, which I believe created an overall better outcome in the end.

Wednesday, January 28, 2015

ZBrush - Lightbox

Aside from PolyPainting your mesh, there is a way to layer images directly onto your mesh. This method is called Lightbox.

Our egg
An egg texture
Today, let's paint an egg. The first image is the mesh we are going to paint on, and the second image is the egg shell texture we are going to apply onto our mesh.

The option to turn on Lightbox is in the 'Texture' tab

To start up Lightbox, you must go to the 'Texture' tab at the top of the window. Then, you must import your texture into ZBrush, where it will appear at the bottom of the available textures. With this texture selected, you must then press 'Add to Spotlight', which is the right-most button on the top row.

The wheel is a set of tools which will let you manipulate the texture directly

Your window will look something like this. The wheel that will show up is a group of tools which will allow you to manipulate the image, such as adjusting the opacity, how much it tiles, the contrast or the size. However, you don't need to do most of this.

Use your brush to paint the texture on
In order to activate painting mode (Making sure that your brush is set to RGB only and that 'Colorize' is on) simply press Z. The editing circle will disappear and your brush will re-appear. Simply edit the mesh to paint the texture on. You can also turn the mesh and re-apply from different angles if a specific area is stretched.

A happy egg!

To turn off the display, press Shift + Z. This will hide the texture and allow you to see your model.

Tuesday, January 27, 2015

ZBrush - Polypaint


Normally with texturing a model, a UV Map needs to be created onto which a texture is painted. However, there is another method that can be used within ZBrush, which has its perks and downfalls.

Polypainting is a method of colouring a model in which each vertex is assigned a colour. The colour will form a gradient with the vertices next to it. This method is also known as vertex painting. The main downfall of this method of texturing a model is that it requires a high-poly mesh to get any sort of detail out of it, which means it is not yet used within games.

Turn on PolyPaint by clicking 'Colorize', making sure to turn on the 'RGB' setting on your brush

To activate PolyPaint, you must go down to the 'PolyPaint' menu and hit 'Colorize'. You must also set your brush to paint 'RGB'. You should also turn off 'Zadd' so that you only paint colour, and avoid modifying the mesh.

Change your colour with the palette

You can change the colour you are painting on your mesh by using the colour palette on the left side of the screen. Normally, this would colour the entire mesh, but since PolyPaint is turned on, this will no longer happen to this SubTool. If you are working with multiple Subtools, this will change the colour of them unless they are already painted.

Lots of gruesome texture

Polypaint is easy to use since you can paint right onto the model. You can also use it with brushes to add texture. This is achieved by turning 'Zadd' on whilst painting.

No longer looking so sharp...

However, one thing to be aware of is that detail will be lost if you go down in subdivisions. This can be avoided by using UV Maps, though this will mean you will have to map your model.

Monday, January 26, 2015

3D Iterations Part 6

Since I have finished the general shape of my gargoyle, I have begun work on detailing. I've been working with alphas to speed up the process of producing the scales, with some success.


I used this image I created to attempt to create an effect like what is on a chicken's foot, which is like small scales.


However, I didn't like how it came out, since it stood out too much against the stylised pattern that I have used on the rest of the gargoyle, so I decided to not carry this through and left it out.


This is the piece, with the texture work mostly finished. I went and put on all the scales, then used a scattered brush to add erosion before smoothing it all out. I may end up smoothing some parts out even more to get a more pronounced erosion effect, but I think it is looking good so far.


A little bonus, trying out a downloaded MatCap with some lighting set up, just to see how I might approach this when I start polypainting next.


Sunday, January 25, 2015

ZBrush - Alphas

Sometimes the standard brushes in ZBrush do not quite get the effect you want in an efficient amount of time. A way to improve this is by using alphas on your brushes.

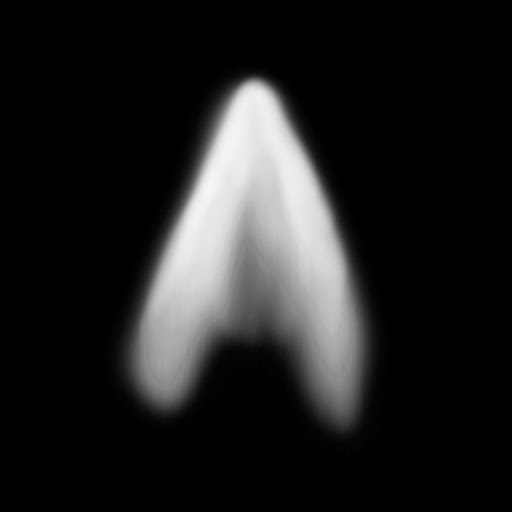
An alpha in image format, before being imported

This is one way of creating an alpha. Alphas in ZBrush work by using a displacement map (the lighter the area, the more that is displaced) which you can import in. You can make these yourself by just using a greyscale image.

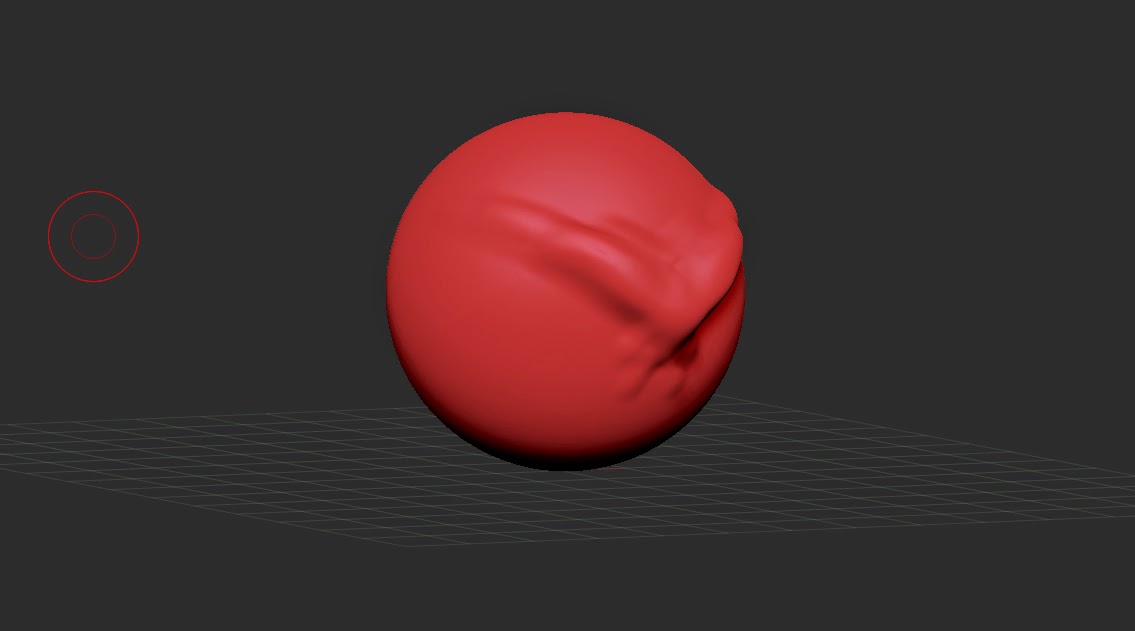
A plain mesh, which could do with some detail
Here is a sphere with a little sculpting work done on it, but it is feeling a little empty, so it's time to add some surface detail.

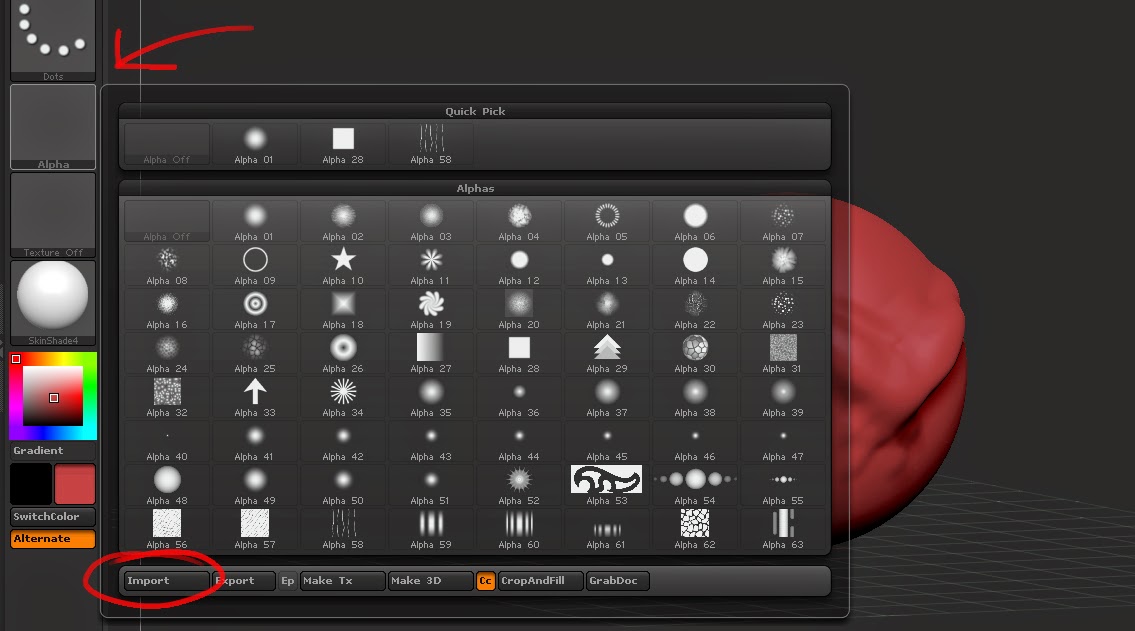
Select the import button and navigate to your saved alpha, then import it. It will appear on the bottom row of the Alphas list
Select the 'Alpha' box on the left side of your screen, and a window should open up. In this window, you must select the 'Import' button at the bottom of this window. This will allow you to navigate to your image file. ZBrush is compatible with .PSDs, JPGs and most other formats, but so far I have not been able to successfully import a PNG file, so avoid using these if possible.

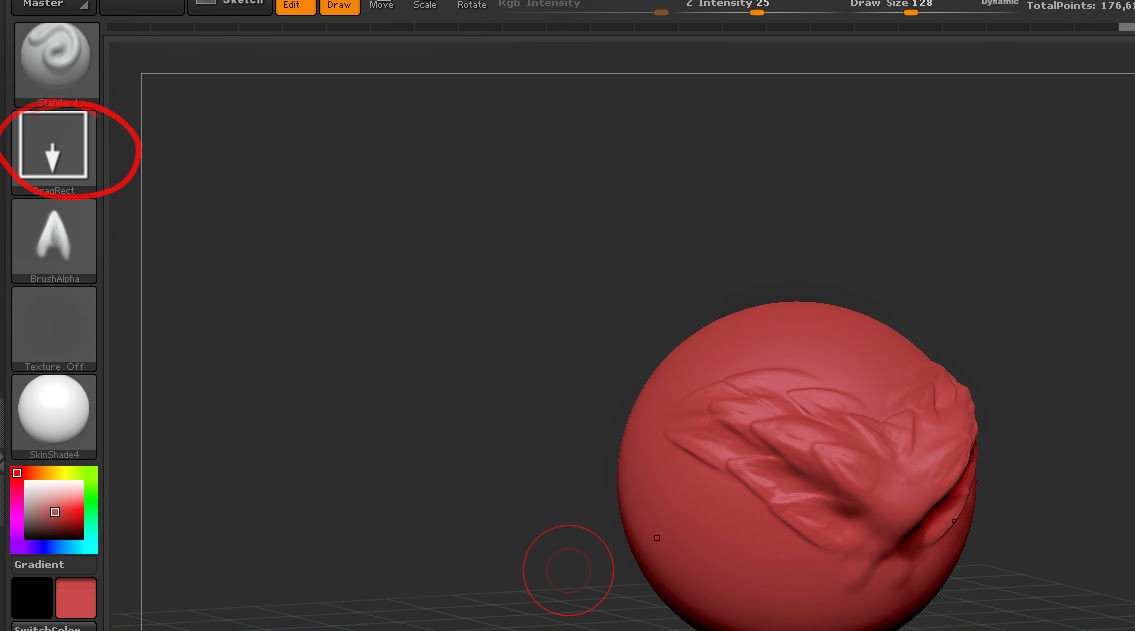
Now you're thinking with alphas!
Now select your imported Alpha, which should appear in the bottom row of your opened window. Now you are able to use the changed brush to add more detail onto your mesh. You can also change the Stroke of the brush to apply it in a different way. DragRect is best used for singular detail, whilst Dots is better used for larger patterns.